
When you set out to order a steak, it makes a statement. It says, “I am a go-getter, and I get what I deserve.” Not only does the steak evoke opulence, but winning a set of steak knives implies you have won the pinnacle of all prizes. Or at least the pinnacle of all consolation prizes.

Cook the perfect steak time after time with the reverse-sear method
Because the steak brings such strong emotion, when you are making a steak on the grill, there really is little room for error. If the steak is underdone, a fleshy pink center becomes a rubbery red chew toy that is hard to swallow. Keep the steak on the flame too long, and its overcooked, grey interior becomes as appealing as a rain delay at the ballpark. But if you have the skills to cook your steak somewhere in between the temperatures of fire and ice, you take the guesswork out of what flavors and texture you will achieve and end up with a steak that is simply sublime.
I have found that the best way to achieve steak perfection is through the use of a roasting thermometer. The method is often referred to as a reverse sear and it is the key to getting consistent results. This is how I reverse sear a steak:
- Take your steak out of the refrigerator and let it warm up to room temperature for about 45 minutes.

Allow the steak to sit out at room temperature while your grill heats up
I like to trim off any silver skin that is easily accessible and will often cut off and discard any excessive bits of fat as well.
- Get your grill heating up and make some preparations for cooking. Plan on having your grill stabilized at about 350F when you begin cooking.
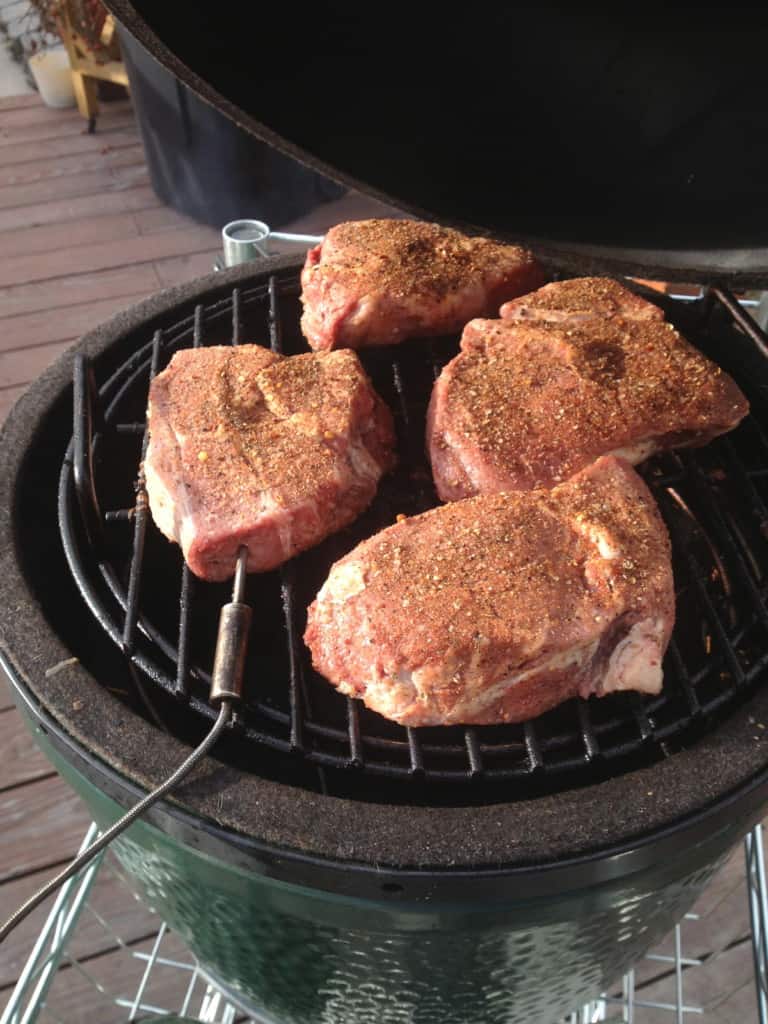
- Season your meat about 10 minutes before you begin cooking. I like to use a combination of a pre-made steak seasoning flavored with garlic powder, salt, and pepper, and a favorite meat rub that has nuances of coriander, cumin, and coffee flavors. Seasoning is simply a matter of preference and at times salt and cracked black pepper simply works best. A word of caution to initially be sparing when using seasonings and rubs with salt added. The salt can often overpower the other flavors.
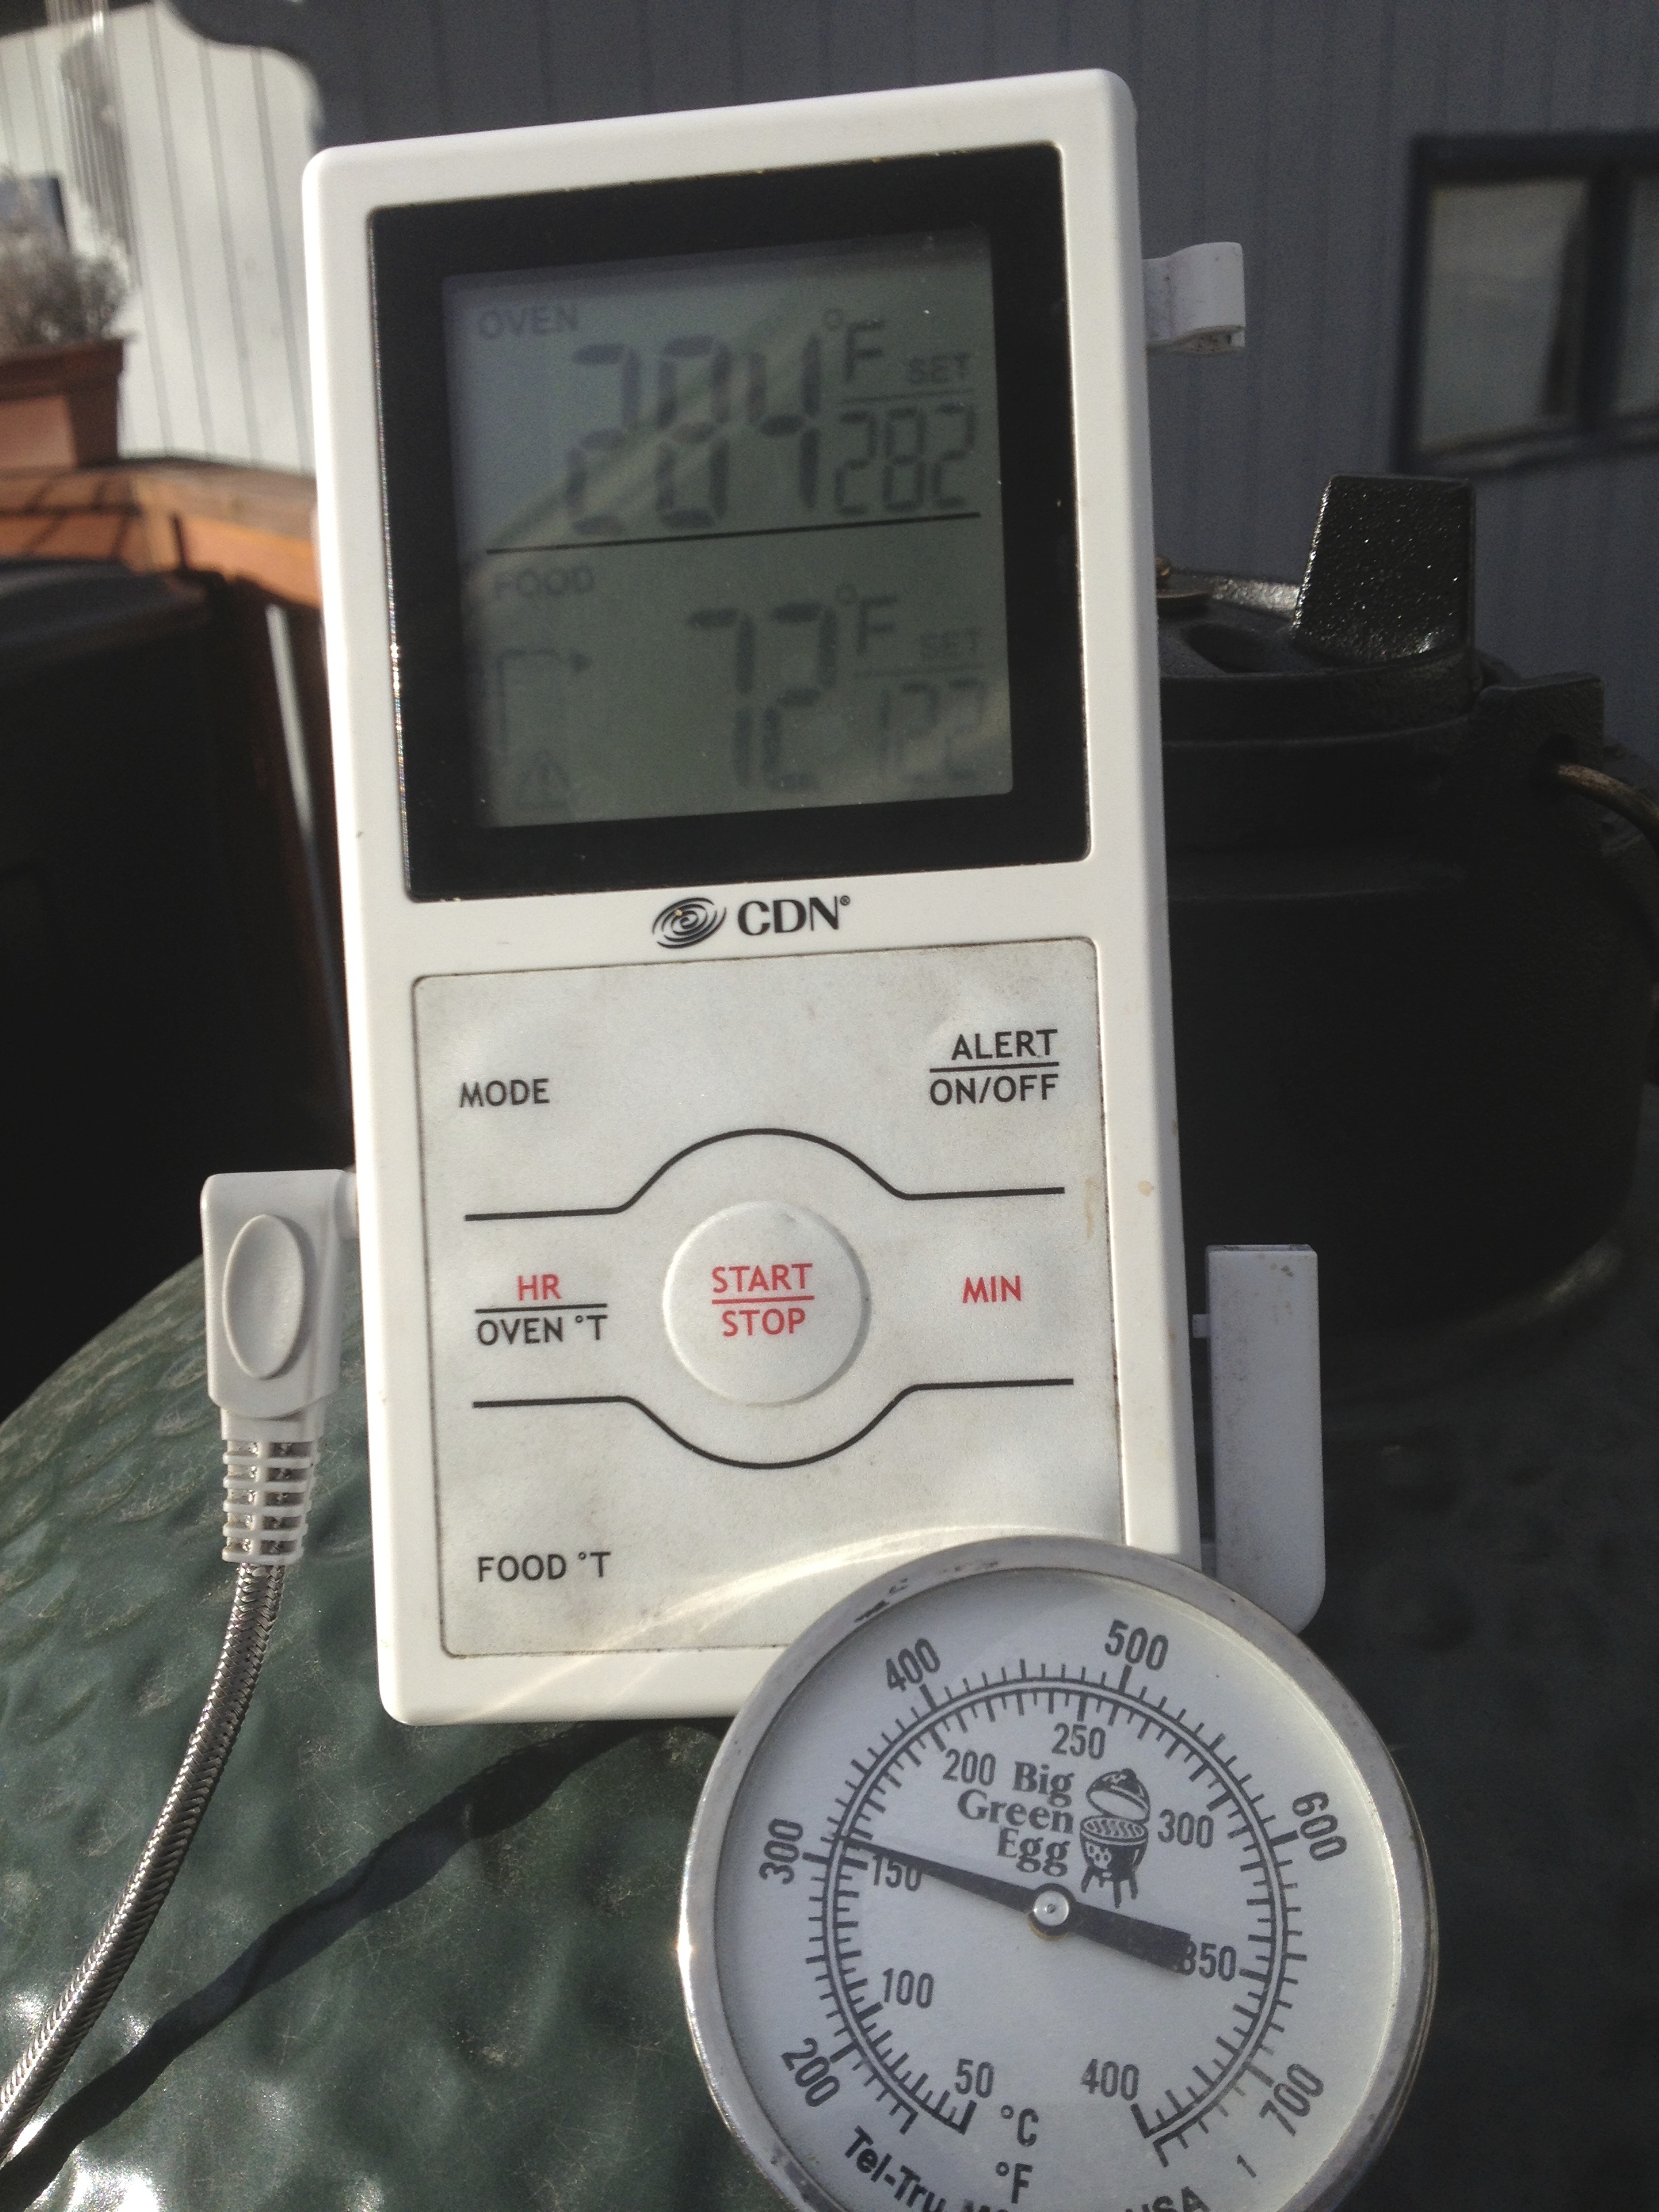
- Insert a digital meat-roasting thermometer halfway up the thickness of the steak and slide it into the meat as close to the center as possible.
Temperature probe inserted and monitoring the meat as it cooks
Because digital meat roasting thermometer probes are often 4 inches or longer, when inserted in the middle and center of the meat, you get a relatively consistent temperature reading throughout.
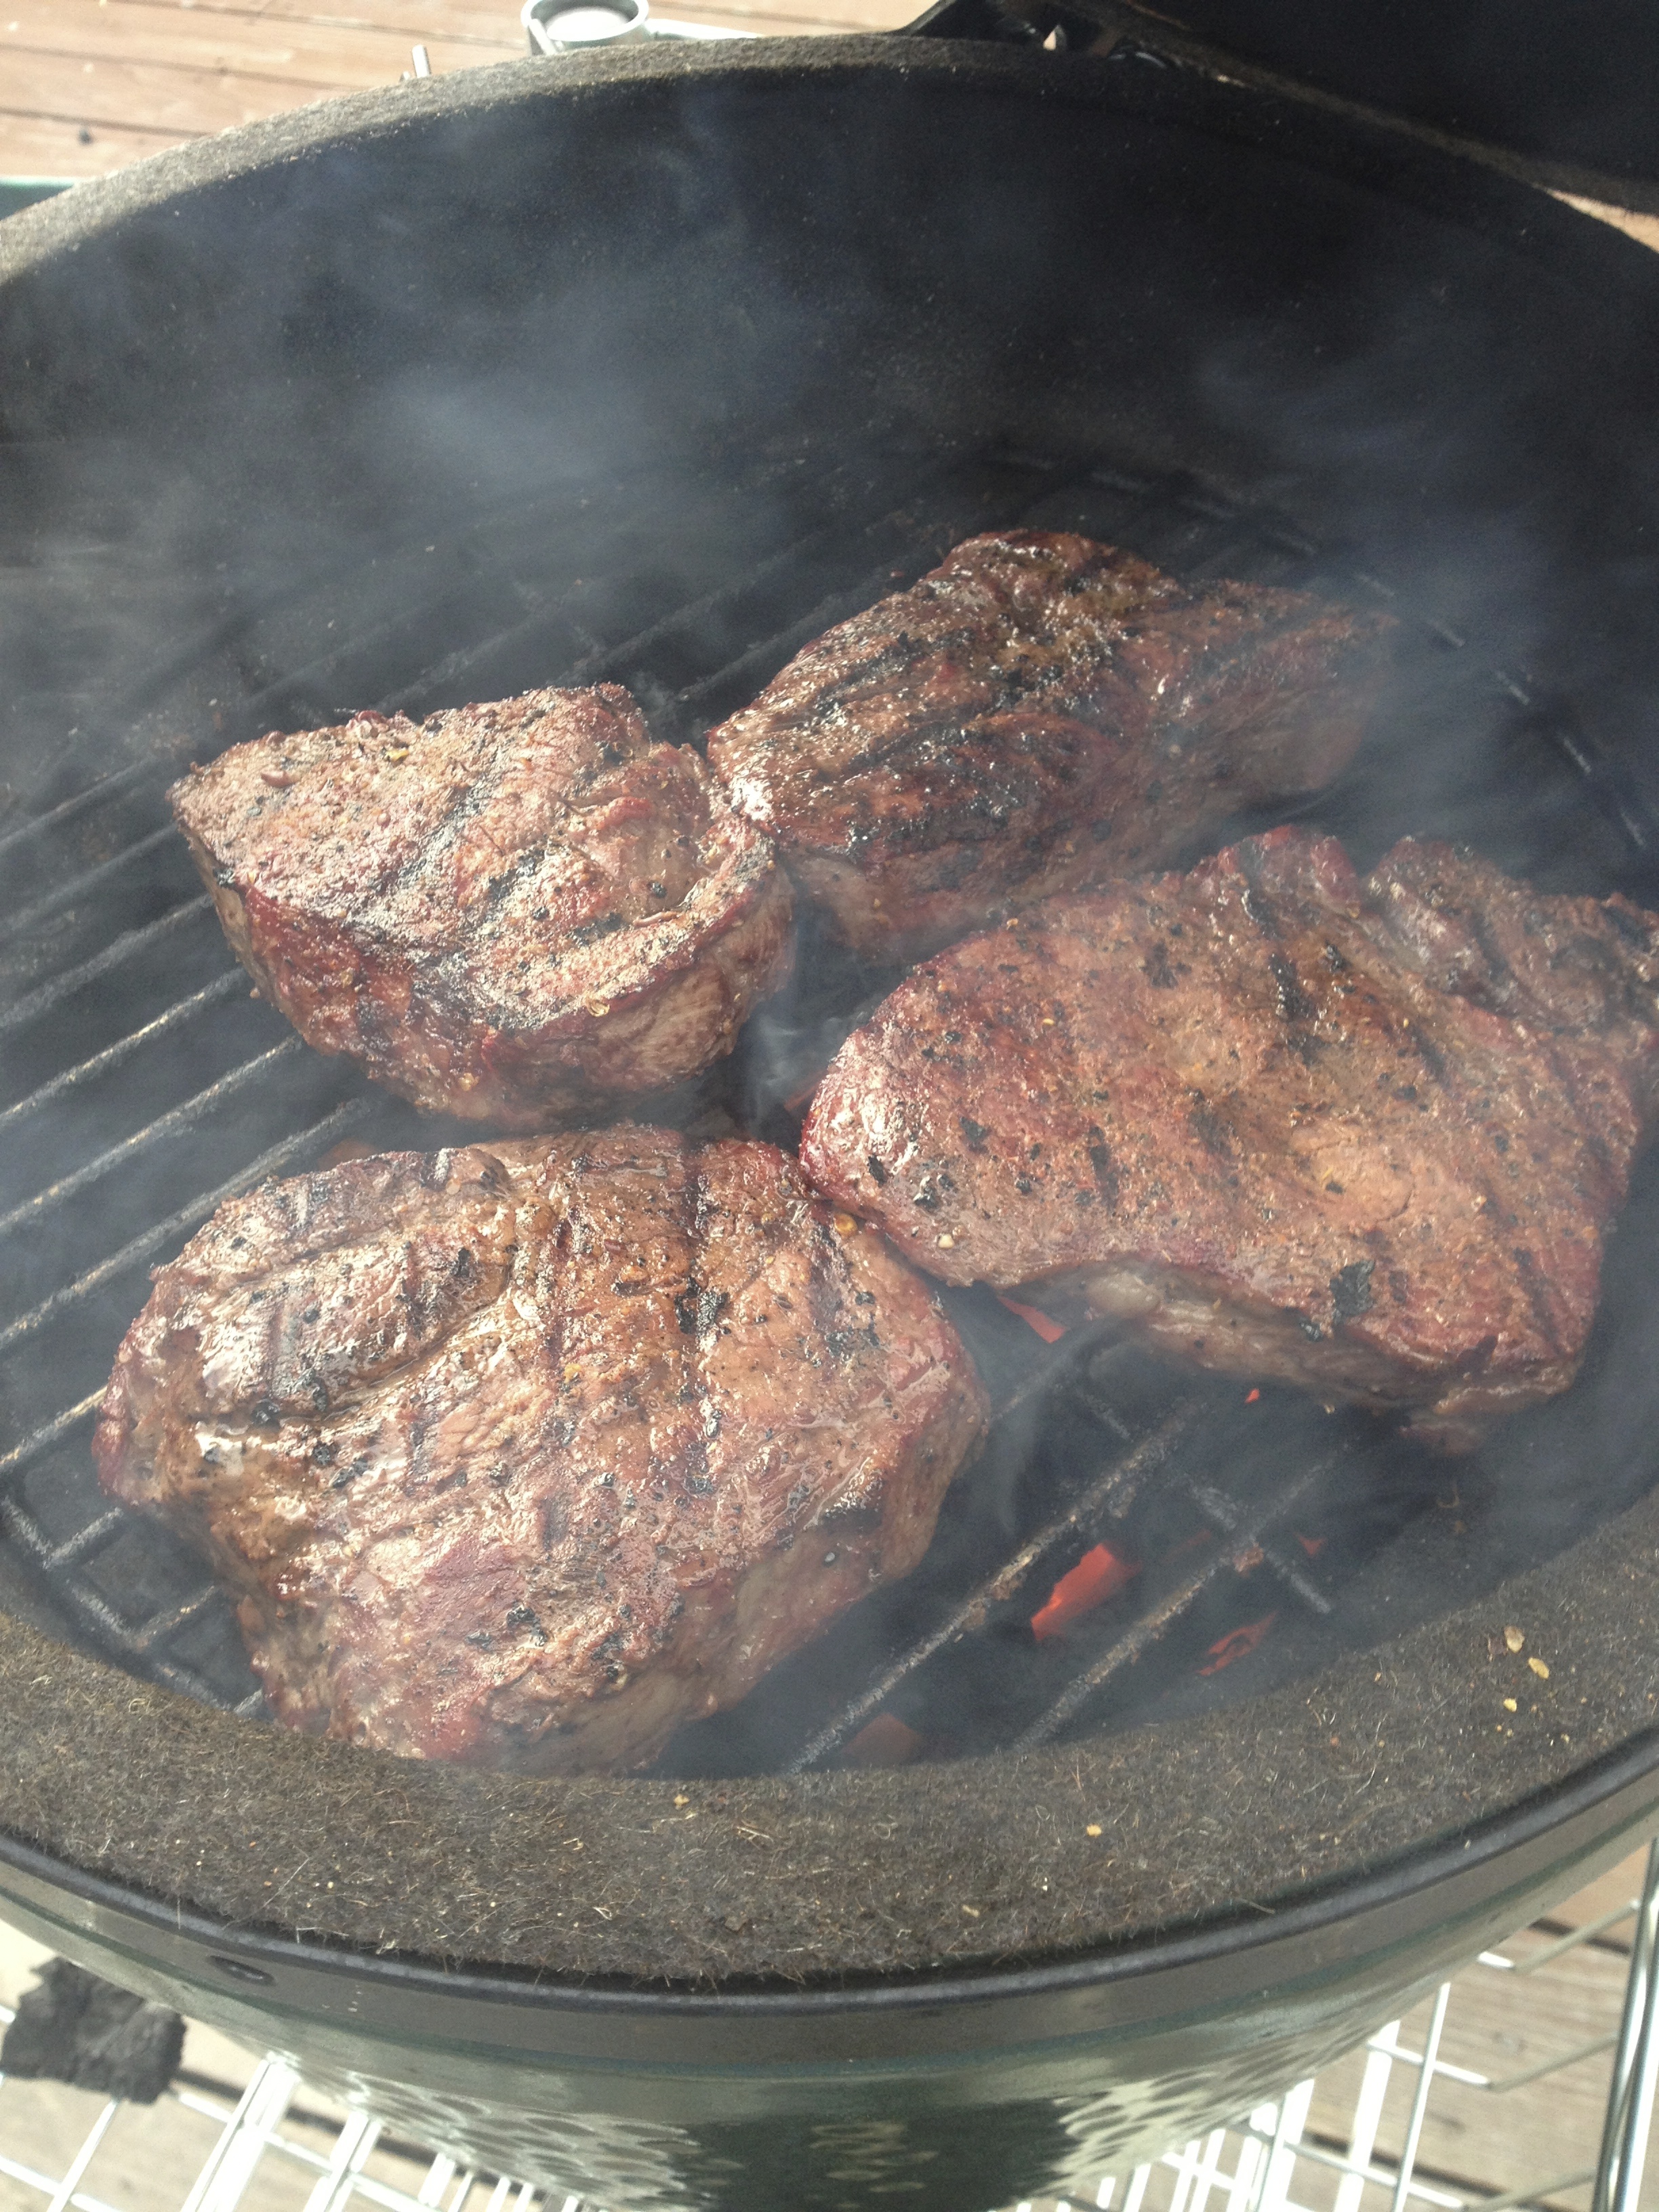
- The meat will initially be roasted, and then seared before service. Start by roasting the meat indirectly, or not sitting it directly over the flames until your desired temperature is achieved.
Steaks roasting away from direct heat
My grill does not allow me to easily roast the meat near or next to the flame, so I have found that I can achieve the same effect by raising the steak vertically away from the flame. This allows the meat to roast and heat up without being directly charred until I am ready.
- The Meat Temperature and Doneness Chart has beef steak cooked medium rare at 135F. Meat will continue to cook after it is off of the heat so I like to roast my steak to about 125F and pull the meat off the grill to rest.
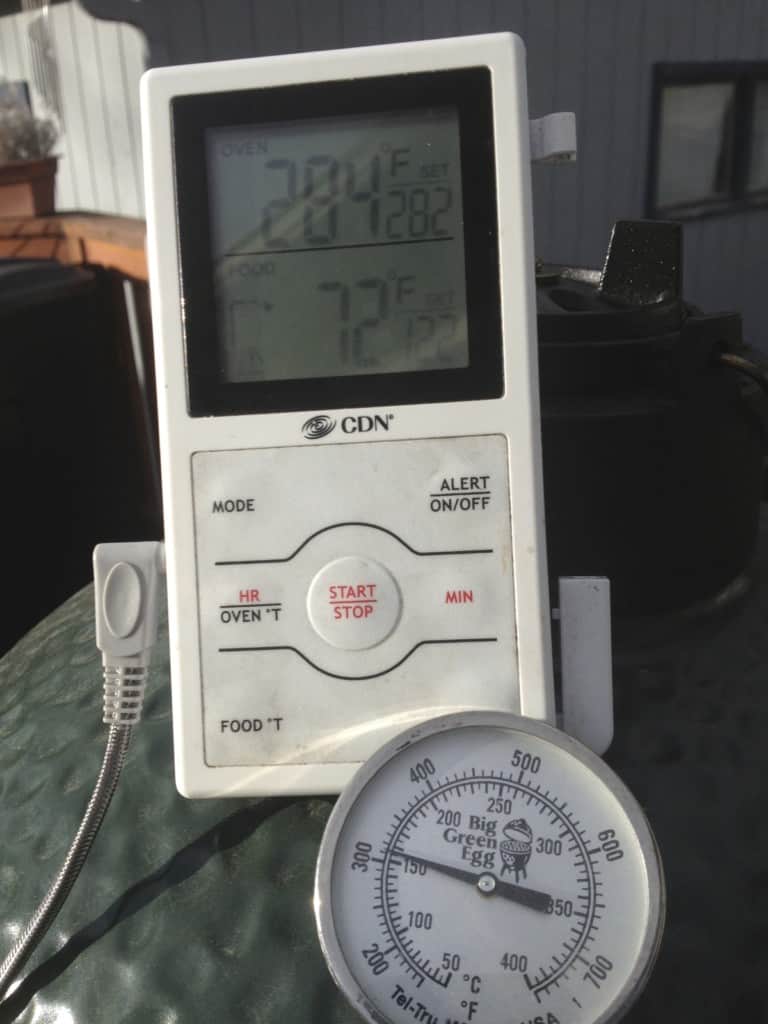
Temperature probe monitoring while steaks are roasting
Remove the meat thermometer and let the meat rest on a plate, covered with foil for a good 10 minutes. This allows the juices to re-distribute.
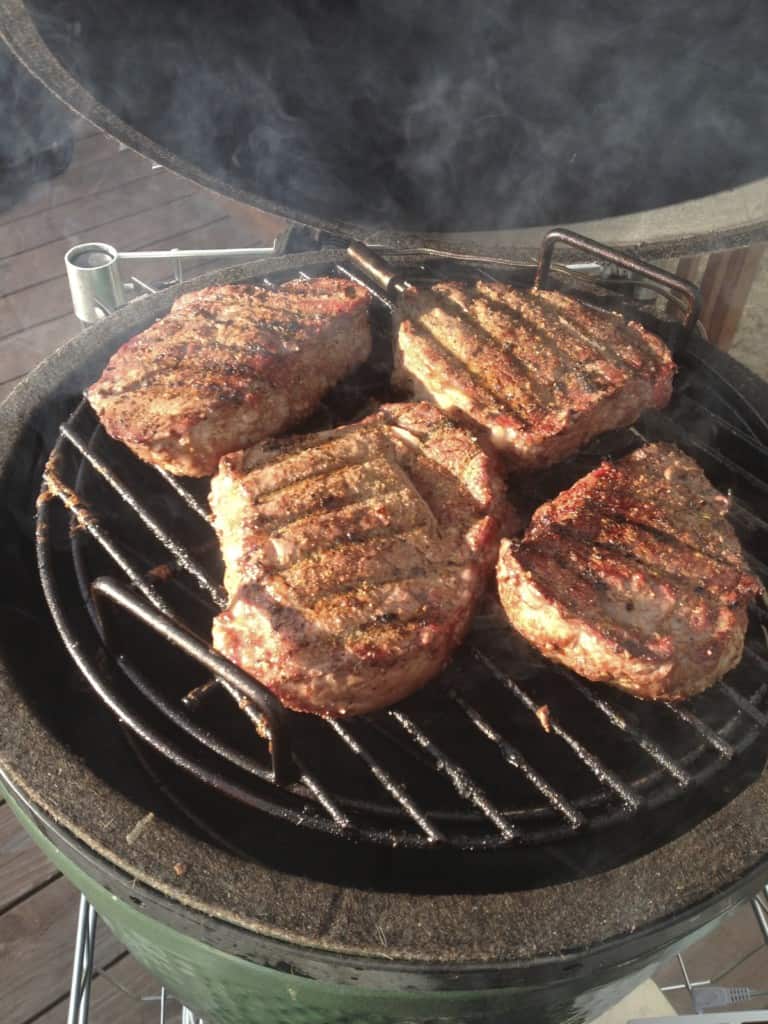
- Resist all temptation to cut into the meat and instead go back to your grill and raise the heat. After the meat has rested, the grill should be between 500 and 600F, an ideal temperature for searing.

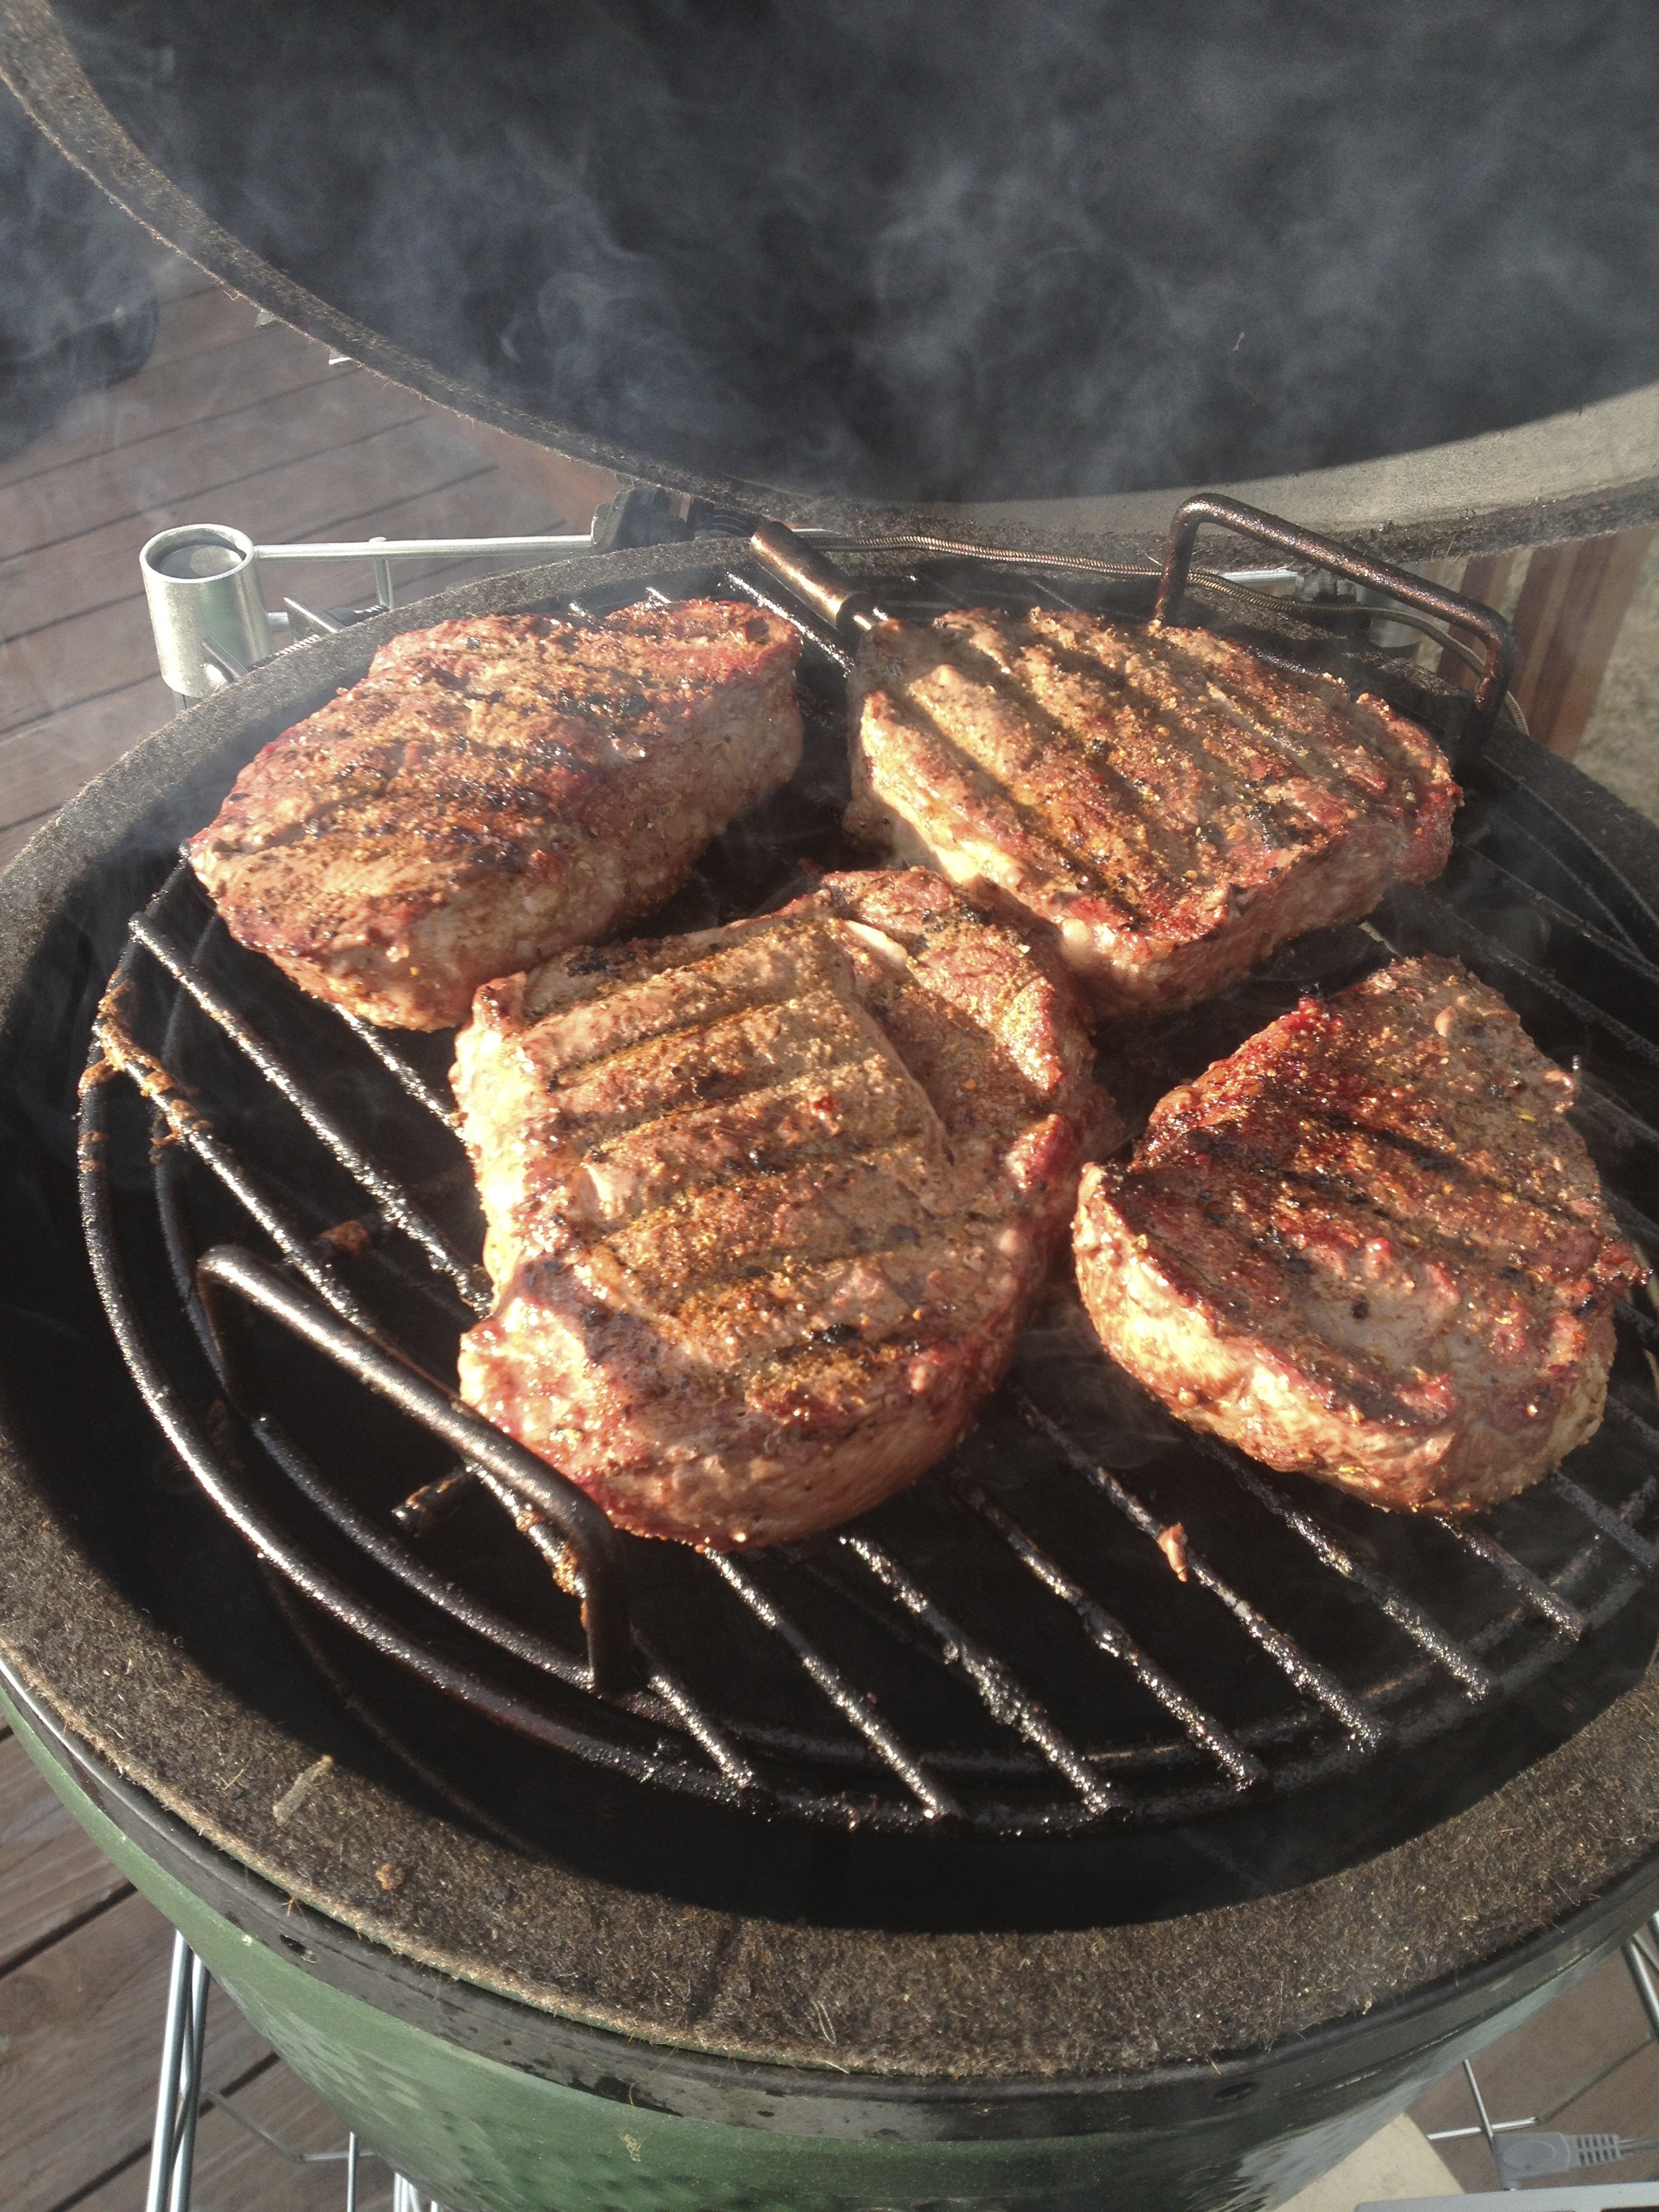
Quickly searing the steaks close to the coals after roasting for a nice char and extra flavor
Searing the meat at a high temperature will give it a beautiful crust, additional grilled flavor, and fabulous grill marks. I hot sear the steaks at the high temperature for about one minute a side. Be sure to take precautions when searing at the higher temperature. Long tongs and gloves for hand protection are a good idea.
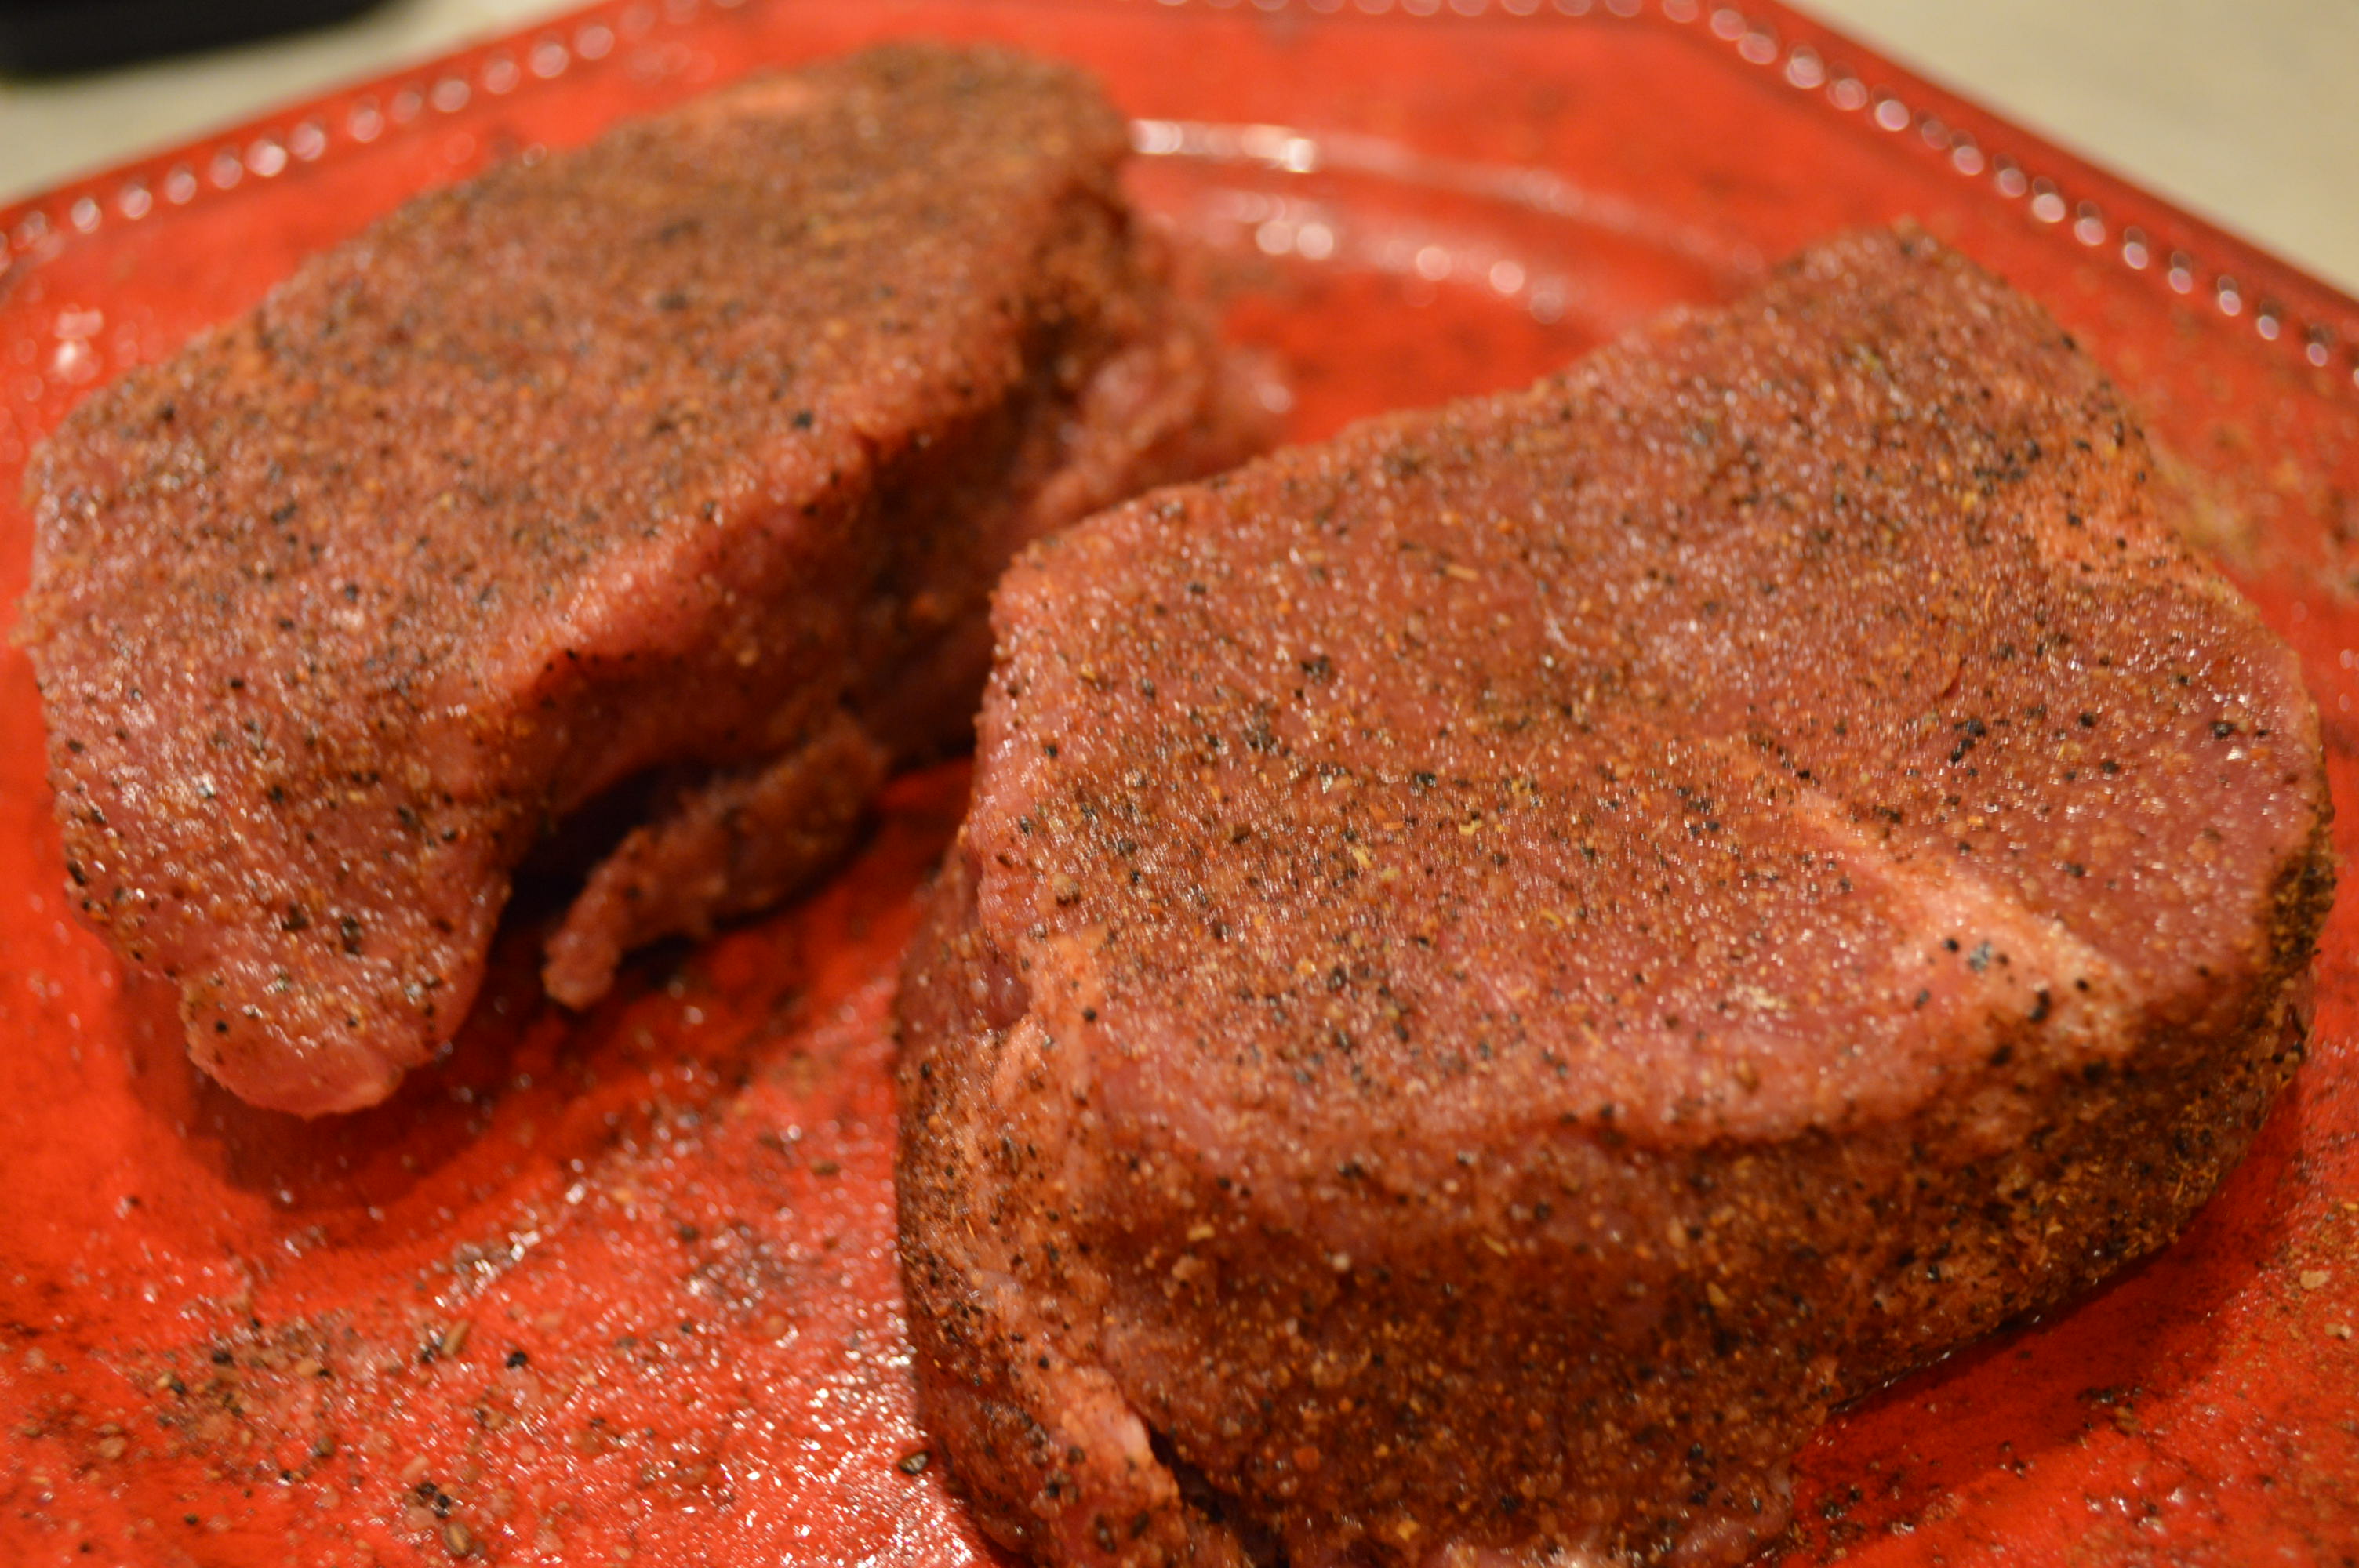
- Plate the steak and serve!

By monitoring the internal temperature of the meat you know that it will be cooked to your desired doneness. Allowing the meat to roast slowly enhances the flavor of the meat while keeping it juicy. The reverse sear method takes the guesswork out of grilling the perfect steak. Now if I can just figure out how to pick the perfect glass of wine to go with it.

Reverse seared steak perfectly cooked and ready for dinner
****************
 Paul moved to Montana in 1996 with about a dozen friends from Lyndon State College in Vermont. He is still reluctantly paying his student loans and has carved out a career working as a supplier representative for various food and beverage products. Paul enjoys grilling after a day on the water or an afternoon in the garden where he has been known to grow heirloom tomatoes and peppers out of spite. Often cooking for extended family and friends, he takes a whimsical approach to cooking simple, seasonal dishes, while not taking it too seriously.
![]()
 Like this blog? Don’t miss another one. Sign up for our E-Newsletter. It provides you with a list of all the week’s stories/blogs and is delivered to your inbox every Tuesday morning.